

I’m often asked how important it is to clean the exterior of your caravan. Is cleaning it once a year really enough, or is it something you need to do more regularly?
It is very important to clean the exterior of your caravan. Scratches, dents, and streaks among other signs of cosmetic wear can severely affect the value of your caravan.
In this blog post, I’m going to explain in more detail how much the condition of your caravan’s exterior can affect its value, how often you should clean your caravan (based on a poll of our readers), and give you a guide to cleaning and maintaining your tourer.
- Contents:
How Is A Caravan’s Value Affected By Its Appearance?
The appearance of your caravan affects its value a great deal. Condition is one of the biggest factors in determining the value of a tourer.
There are several things that affect the value of a caravan, including:
- Overall condition of the paint and body
- Service history
- Age
- Extras included
- Repairs required
If you’re getting your caravan valued, the factor that will affect it’s value the most is its condition. Condition is arguably more important than age where depreciation is concerned. After all, if your caravan’s body is dented and scratched, it’s perfectly plausible that an older caravan in good condition will be worth more.
Examples of poor condition resulting in increased depreciation
To try and demonstrate how your caravan’s condition impacts its value, I took a look at some second-hand caravans. First and foremost, I looked at the Bailey Unicorn Cadiz (2015).
A pristine Bailey Unicorn Cadiz (2015) has an average market value of £15,995.
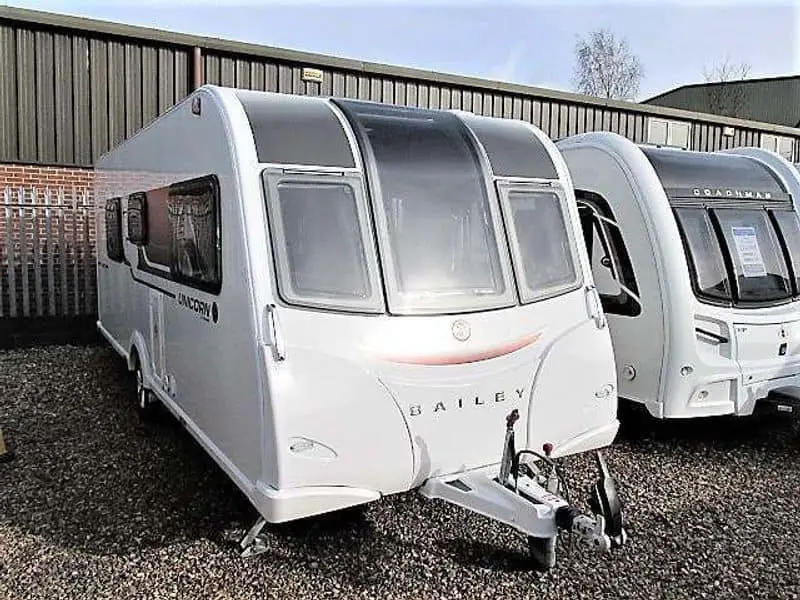
I found 4 caravans of the same age with bad black streaks costing between £14,500 – £15,200. The difference in value is quite significant, considering the caravans are supposedly almost exactly the same otherwise.
Secondly, I looked at the Buccaneer Cutter (2015), an extremely luxurious 4 berth caravan. The average cost of a Buccaneer Cutter (2015) is £19,999.
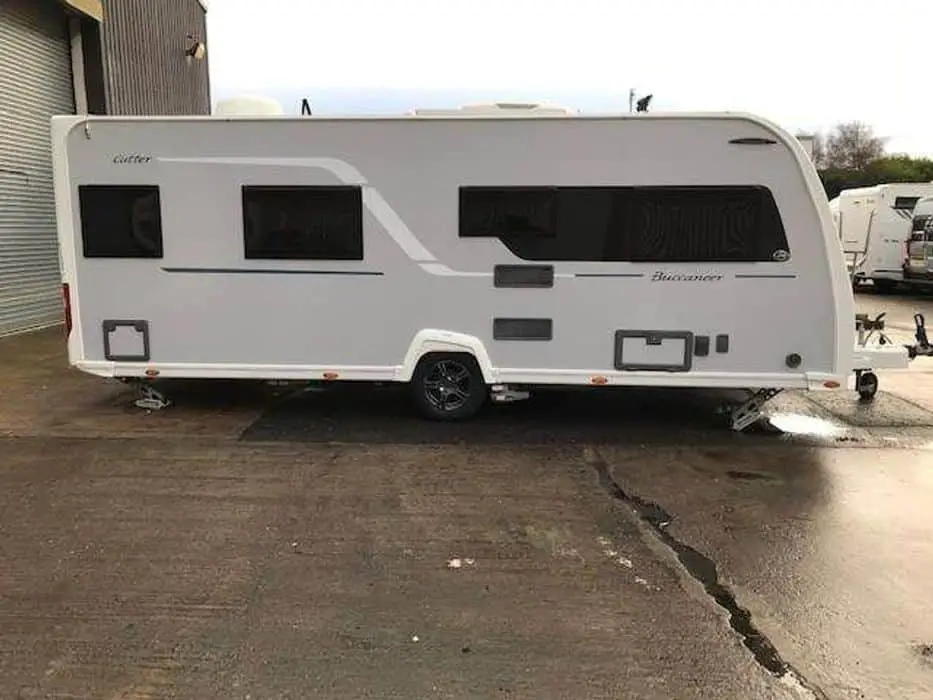
As part of my research, I found two Buccaneer Cutters (2015). One had black streaks whereas the other had cosmetic damage on the nearside. One was priced at £19,000 (black streaks) whereas the other was priced at £18,500 (cosmetic damage). At the end of the day, this demonstrates an increase in depreciation because of the cosmetic appearance of the caravans externally.
Lastly, I looked at the Coachman Laser Xcel 875 (2020). This luxurious 4 berth caravan has a market value of £30,000.
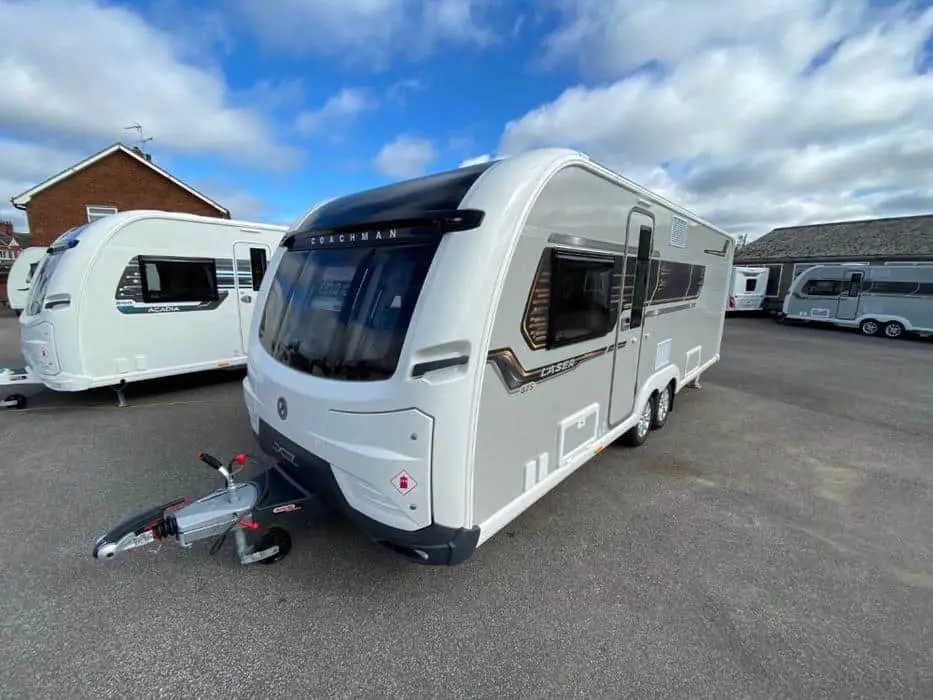
I found 2 Coachman Xcel 875s with damage. One had damage to the front left wing, whereas one had damage to the rear of the caravan. One cost £28,500 (left wing damage) whereas the other cost £27,000 (damage to the rear). This demonstrates perfectly how damage can drag down the value of your caravan.
I spoke to a caravan dealer based in Yorkshire, UK about how the condition affects a caravan’s value. Even a small dent can cause the value of your caravan to drop £100 – £1,000 against the market value, depending on the age and manufacturer. Furthermore, paintwork tarnished with unremovable streaks can also reduce the value of your tourer.
According to Leisure Shop Direct, a caravan depreciates at a rate of about 15% per year. The rate of depreciation is increased rapidly if your caravan’s appearance isn’t up to scratch.
So what can you do to avoid increasing the rate of your caravan’s depreciation?
- Regularly wash your vehicle: Cleaning your caravan regularly prevents dirt and algae from causing permanent damage. Dirt and grime can become ‘baked in’ over time, resulting in permanent, irreversible marks on your caravan.
- Use a caravan cover: When your caravan cover isn’t in use, you should be using a caravan cover. A caravan cover should protect your caravan from scratches, dirt, and grit which are 3 of the biggest concerns.
- Perform maintenance as required: Don’t let problems build up; perform maintenance whenever problems arise.
In the next section of the blog, I’m going to talk through the results of the FCW readers poll, where we asked readers how often they clean their caravans.
FCW Readers Poll: How Often Do You Clean Your Caravan?
When I was planning this blog post out, I wondered how often other caravan owners clean their tourers. I decided to send out a poll to our subscribed readers asking how often do you clean your caravan?
I’m obsessive when it comes to cleaning my Bailey Pegasus 546, because it really is my pride and joy. I wondered what other caravan owners were like with their caravans.
402 readers responded to the survey, and here’s a graph demonstrating the responses.

A whopping 62% of respondents wash their caravan at least twice a year, which sounds about right. 20% of respondents claim to wash their caravan monthly, while 5% say they wash theirs weekly. Now that really is caring for your tourer!
Surprisingly, 3% of respondents said they never clean their caravan. I know how dirty my caravan gets after just a few journeys, so I’d love to see the condition of their tourers!
A sizeable amount of respondents (12%) answered Other in answer. For respondents who selected that answer, there was a text box asking them to explain their response. Here are some comments from readers who participated.
Colin said, “I hate when my caravan’s dirty. I clean it before and after every trip. We use our Buccaneer about 10 times per year.”
Audrey agreed, saying, “My husband and I always give our caravan a quick clean before we go anywhere.”
A lot of respondents responded along the same lines, whereas others like Frank said they “clean, polish, and wax” their tourer before returning it to storage at the season’s end.
It’s fair to say, I think, that the vast majority of respondents take cleaning their caravan very seriously. You should too, because if your caravan is left dirty for too long, dirt can become ‘baked in’, making it very difficult if not impossible to restore your caravan’s exterior to its gleaming shine.
Cleaning Your Caravan: Step-by-step Process For Cleaning Your Tourer’s Exterior
At the beginning of this blog post, I gave a 6 step process for cleaning your caravan.
- Prepare your caravan
- Clean the roof
- Hose down the caravan
- Apply cleaning product as required
- Polish your caravan
- Apply wax to your caravan
This is the process I’ve always followed personally. I did a great deal of research prior to purchasing my caravan, so I’m confident that this is the very best process for cleaning the exterior of your tourer.
1. Prepare your caravan
Prior to anything, you must prepare your caravan. By prepare your caravan, I mean situate it in an ideal position that is suitable for cleaning.
There are two things to keep in mind.
- You must be able to comfortably walk around your caravan, as well as place your ladders anywhere
- Excess water must be able to run off your caravan, rather than just pooling
So first things first, move your caravan into a position where you can comfortably walk all the way around it. You should have enough room all the way around the exterior to place your step ladders.
Ideally, you should situate your caravan on a slight incline so that excess water can run off the roof during cleaning. Alternatively, you can raise or lower the jockey wheel to slope the caravan roof. These are two methods for ensuring the water can easily run off your caravan.
2. Clean the roof
The first part of your caravan you should clean is the roof. You should always clean the roof first and foremost because this is where dirt is most likely to gather.
As part of cleaning the roof, it’s likely that dirt will end up washing down the front and the sides of your caravan. Therefore you’ll end up cleaning the front, back, and sides of your caravan twice if you clean them before you clean the roof!
To clean the roof of your caravan, there’s a few things you’re going to need.
- Step ladders
- Telescopic brush
- Microfibre cloths
- Caravan cleaner
- Hose pipe
As long as you have all of the above, you’re good to go. I assume most people will already have access to these, so you probably won’t need to go out and purchase anything.
Cleaning the roof of your caravan is undoubtedly the most difficult part of cleaning your tourer. It takes a long time and is potentially dangerous if you’re not careful.
Cleaning the roof of your caravan really is a job for two people. One person can handle the cleaning of the roof, but it’s good to have another person around to pass things to the person on a ladder. Furthermore, you probably want someone to keep an eye on the ladder for you, keeping an eye out for things like ladder slippage.
Once you have safely got your ladder set up and your cleaning products ready to go, it’s time to begin cleaning the roof. It’s best to use the telescopic brush to clean the immediate service area around you, rather than stretching over the caravan and trying to clean a large area. This is dangerous and you’ll potentially damage the caravan if you lean too heavily on one part of the roof.
As you clean each area of the roof, remove the water as you go rather than leaving it to sit and dry.
If you’re a caravan enthusiast, it’s possible you’ve heard of The Trudgians. Here’s a video they released that demonstrates safely and effectively cleaning the roof of your caravan. It’s well worth a watch prior to cleaning the roof of your caravan for the first time.
The video above is an excellent example of how you can clean the roof of your caravan properly. It’s not the most fun of tasks, but it’s not as tough as it first might seem either. You just have to be very careful, ensuring you don’t over-extend yourself and end up putting yourself in danger. No one wants to fall off the roof of a caravan!
3. Hose down the caravan
Once you’ve cleaned the roof (which is quite a big task!) you can get on with cleaning the rest of the caravan.
Before applying any cleaning products to your caravan, you should hose it down. You should’t use a jet pressure washer if you can avoid it, but rather just a garden hose with a low water pressure.
By hosing down your caravan, you remove any dirt, grime, and grit that is sat of the surface of your tourer’s exterior. If you don’t complete this step prior to applying cleaning product to the surface of your caravan, you could end up causing a lot of damage by grinding grit into the paintwork as you clean it.
4. Apply cleaning product as required
Once you’ve hosed down the caravan’s exterior, you can get down to actually cleaning it.
At this stage, you want to get your cleaning product at the ready and begin applying it to the caravan. Some cleaning products spray onto the exterior of the caravan, or perhaps you’ve mixed concentrate with some water and you’re applying it with a sponge or cloth of sorts.
Do one section of the caravan at a time, because you cannot allow the caravan cleaner to dry on a caravan. If you leave the caravan cleaner to dry on your tourer, there will be patches and streaks. So clean one little section of the caravan before moving onto the next section and avoid letting the cleaner dry.
To avoid letting the cleaner dry into the caravan, wash the cleaner off with clean water before moving onto the next section of the caravan. Follow this process until you have cleaned the entirety of the caravan.
If you have a silicon blade to hand, remove any excess water at this point. However, remove excess water from the windows of your caravan using microfibre cloths to avoid scratches.
If you don’t already have a caravan cleaner, my best recommendation is Fenwick’s Caravan Cleaner Concentrate. This is the product that I use personally.
5. Polish your caravan
Is your caravan lacking that gleam it had when you first purchased it? If so, it might be worthwhile polishing your caravan.
Most people polish their caravan once a year or so, and that’s more than enough in my experience. Polish helps you maintain your paintwork’s clean, sparkling appearance.
Prior to polishing, the dullness of your caravan’s paintwork is caused by the sun’s UV rays. Caravan polishing products reverse the effects of UV ray damage, restoring your caravan’s paintwork to its shiny original form.
Here’s a video from The Camping and Caravanning Club that briefly discusses the importance of polishing your caravan. It also demonstrates how you can use polish to best effect.
This is a basic video, but it gives you a gist of how you would go about polishing your caravan. Basically, apply a thin layer of polish to the paintwork in overlapping circles.
You should leave the polish on the surface of the caravan for around 20 – 25 minutes most of the time, before buffing with a finishing cloth.
The polish I use is Autoglym super resin polish. It doesn’t state that this polish is created for caravans, but I’ve used it on mine for years and never had any issues. It leaves a fantastic shine.
6. Wax your caravan
If you’re using a polish that doesn’t already contain wax, at this stage you need to wax your caravan.
Wax is a product that doesn’t clean your caravan, but rather it adds a protective layer to the body of your tourer.
You should apply wax and then keep it on the surface of your caravan for approximately 30 minutes before buffing. The wax will then protect your caravan and protects from streaks, grit, and so on in the future.
Make sure that you use a wax designed for caravans, such as Fenwick’s Bobby Dazzler. This product adds a protective layer to your caravan post-wash, repelling water, dirt, and algae.